SwiftUI Push Notifications with Firebase: A Step-by-Step Guide
If you’re a developer looking to enhance your app’s feature and user engagement, push notification is one of the key.
A push notification is a short message that appears as a pop-up on your desktop browser, mobile home screen, or in your device notification center from a mobile app. — IBM (https://www.ibm.com/topics/push-notifications)
Let’s embark on this technical journey and equip your SwiftUI app with the power of Firebase push notifications.
Setting up SwiftUI Project
Open XCode and create SwiftUI project named “PushNo”. Add Push Notifications on Signing & Capabilities by tap + Capability button.

Also add Background Modes and enable that 3 options.

Setting up Firebase
Open https://console.firebase.google.com and add a project. After that, i input “PushNo” as my project name for this tutorial and turn off google analytics for now. Then, create that project. You will need to add firebase to your app by filling some form. First, input your app bundle that you can find on your xcodeproj and your app nickname.

Then you need to download and move the GoogleService-Info.plist, the file you just downloaded into the root of your Xcode project and add it to all targets. After that, you need to add Firebase SDK to your project using Swift Package Manager. You can find swift package manager on File> Add Package. Paste the url and click add package.

Find and check FirebaseMessaging

After that, add initialization provided by Firebase to our PushNoApp.swift. In the code snippet you provided, we’re incorporating crucial Firebase initialization within our SwiftUI app. We create an AppDelegate class, a pivotal component in the app's startup process. The AppDelegate class contains the application(_:didFinishLaunchingWithOptions:) method, where we configure Firebase using FirebaseApp.configure(). This step is essential because it establishes the connection between our app and Firebase services. By configuring Firebase at launch, we enable various features, such as push notifications and real-time functionality, which significantly enhance the user experience. Furthermore, the @UIApplicationDelegateAdaptor attribute in the PushNoApp structure ensures that our custom AppDelegate is used for Firebase setup when the app launches, seamlessly integrating Firebase into our SwiftUI app's lifecycle. This integration is a fundamental bridge, allowing Firebase to manage the communication between our app and cloud-based services, ensuring the smooth operation of features like push notifications.
import SwiftUI
import FirebaseCore

class AppDelegate: NSObject, UIApplicationDelegate {
  func application(_ application: UIApplication,
                   didFinishLaunchingWithOptions launchOptions: [UIApplication.LaunchOptionsKey : Any]? = nil) -> Bool {
    FirebaseApp.configure()
    return true
  }
}

@main
struct PushNoApp: App {
    @UIApplicationDelegateAdaptor(AppDelegate.self) var delegate
    var body: some Scene {
        WindowGroup {
            ContentView()
        }
    }
}
Configuring Apple Push Notification Service
After configuring firebase and xcode project, this is where Apple’s APNs (Apple Push Notification service) comes into play. APNs is a vital component for delivering push notifications to iOS devices, regardless of the backend service we use. Even though we’re utilizing Firebase for sending notifications, it relies on the infrastructure provided by APNs to actually deliver those messages to devices.
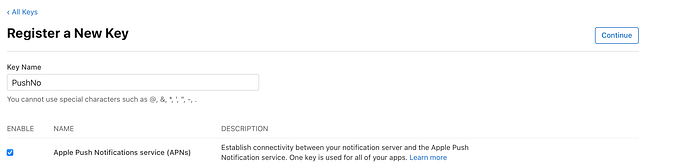
To configure this we need to login into https://developer.apple.com/ account. After that open Certificates, Identifiers & Profiles : https://developer.apple.com/account/resources/certificates/list . Register new key and continue. Dont forget to check APNs. After that you can download your key.
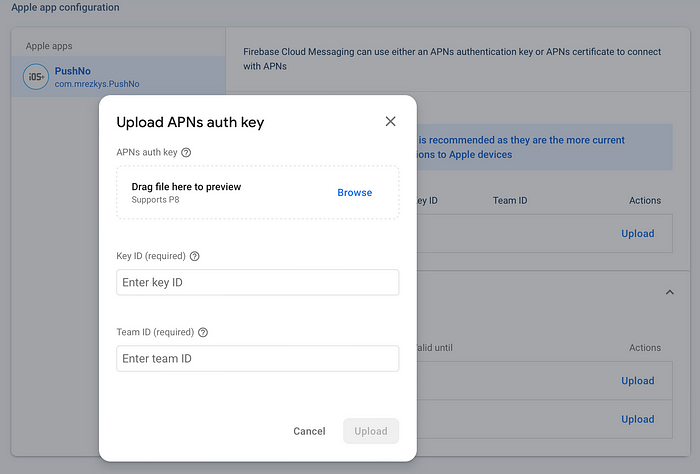
After that, open firebase console again and go to Project Settings>Cloud Messaging. Upload your key and enter Key ID that you get after creating above key and Team ID from your apple developer account (https://developer.apple.com/account).
Coding for Push Notification
Lets go back to our PushNoApp.swift. The next step is we need to add protocol to our AppDelegate. AppDelegate class is extended to adopt three important protocols: MessagingDelegate, UNUserNotificationCenterDelegate, and UIApplicationDelegate. These extensions enable our app to handle Firebase Cloud Messaging (FCM) for remote notifications and local notifications from the user's notification center.
Within the application(_:didFinishLaunchingWithOptions:) method, we perform the following essential tasks:
- Register for Remote Notifications: We use
application.registerForRemoteNotifications()to establish a link with Apple's Push Notification service (APNs). This step is crucial for receiving remote push notifications. - Configure Firebase: We call
FirebaseApp.configure()to set up Firebase services, including FCM, for our app. - Set Delegates: We designate our
AppDelegateas the delegate for both FCM (viaMessaging.messaging().delegate) and local notifications (viaUNUserNotificationCenter.current().delegate).
After that, use @UIApplicationDelegateAdaptor to seamlessly integrate the AppDelegate into the SwiftUI app's lifecycle.
class AppDelegate: NSObject, UIApplicationDelegate, MessagingDelegate, UNUserNotificationCenterDelegate {
    func application(_ application: UIApplication,
                     didFinishLaunchingWithOptions launchOptions: [UIApplication.LaunchOptionsKey : Any]? = nil) -> Bool {
        application.registerForRemoteNotifications()
        FirebaseApp.configure()
        Messaging.messaging().delegate = self
        UNUserNotificationCenter.current().delegate = self
        return true
    }
}

@main
struct PushNoApp: App {

    // register app delegate for Firebase setup
    @UIApplicationDelegateAdaptor(AppDelegate.self) var delegate
    var body: some Scene {
        WindowGroup {
            ContentView()
        }
    }
}
After that, our app is ready to receive push notification from the firebase. Next, to ensure that the notification will displayed, we need to configure notification authorization for our app from the device. Create a new file named NotificationManager.swift , we gonna use that to handle all things related to app notification.
import Foundation
import UserNotifications

@MainActor
class NotificationManager: ObservableObject{
    @Published private(set) var hasPermission = false

    init() {
        Task{
            await getAuthStatus()
        }
    }

    func request() async{
        do {
            try await UNUserNotificationCenter.current().requestAuthorization(options: [.alert, .badge, .sound])
             await getAuthStatus()
        } catch{
            print(error)
        }
    }

    func getAuthStatus() async {
        let status = await UNUserNotificationCenter.current().notificationSettings()
        switch status.authorizationStatus {
        case .authorized, .ephemeral, .provisional:
            hasPermission = true
        default:
            hasPermission = false
        }
    }
}
The NotificationManager class is marked with @MainActor, indicating that its methods should be called from the main UI thread to ensure thread safety, especially when using Swift's concurrency features. But it’s important to note that this attribute primarily applies to Swift concurrency features introduced in Swift 5.5 (such as structured concurrency with async/await).
The hasPermission property is marked with @Published to create a publisher for this property, allowing SwiftUI views to observe changes to it and automatically update themselves when its value changes.
The initializer, init(), starts the process by immediately checking the current notification authorization status using await getAuthStatus().
The request() method is an asynchronous function that requests notification authorization from the user. It uses UNUserNotificationCenter to request authorization for various notification options (alerts, badges, sounds), and upon completing the request, it calls await getAuthStatus() to update the authorization status in the hasPermission property. Any errors during this process are caught with try-catch and printed to the console.
The getAuthStatus() method asynchronously checks the current notification settings and updates the hasPermission property based on the authorization status. If the app is authorized or in the ephemeral or provisional state, hasPermission is set to true; otherwise, it's set to false.
Coding for User Interface
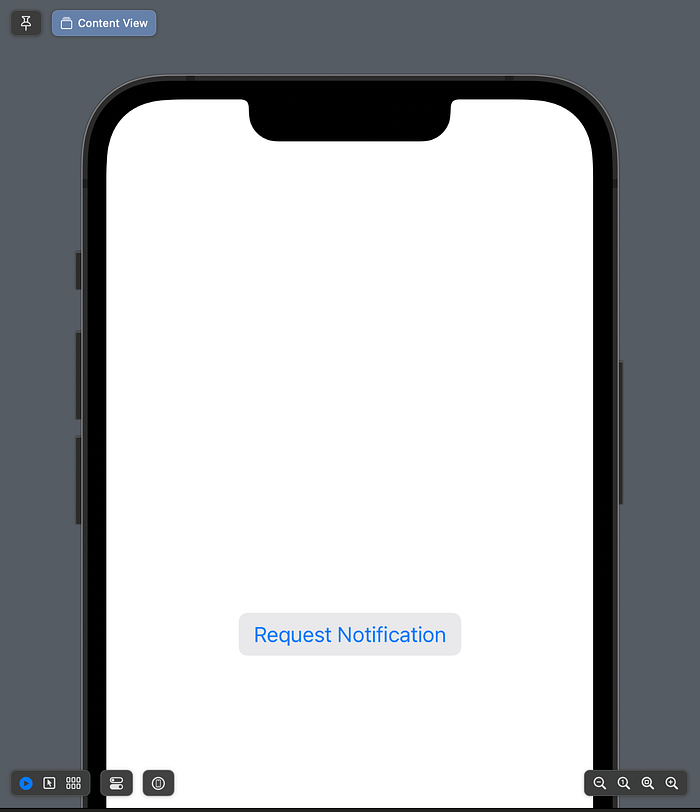
Now we are going to make the user interface to access the notification manager and try the push notification.
import SwiftUI

struct ContentView: View {
    @StateObject var notificationManager = NotificationManager()
    var body: some View{
        VStack{
            Button("Request Notification"){
                Task{
                    await notificationManager.request()
                }
            }
            .buttonStyle(.bordered)
            .disabled(notificationManager.hasPermission)
            .task {
                await notificationManager.getAuthStatus()
            }
        }
    }

}

struct ContentView_Previews: PreviewProvider {
    static var previews: some View {
        ContentView()
    }
}
Test Push Notification
To test push notification, you need to know your device fcm token. To do that, first we need to implement 2 more method. First, the application(_:didRegisterForRemoteNotificationsWithDeviceToken:) method. This method is automatically invoked upon successful registration for remote notifications, providing us with the device token. Within this method, we establish a link between the APNs token and the FCM library by assigning the APNs token to Messaging.messaging().apnsToken. Secondly, messaging(_:didReceiveRegistrationToken:) method handles the receipt of the FCM registration token. When the FCM token is received, we extract it and print it. This FCM token acts as a unique identifier for the app instance, enabling us to send targeted push notifications through FCM.
class AppDelegate: NSObject, UIApplicationDelegate, MessagingDelegate, UNUserNotificationCenterDelegate {
    func application(_ application: UIApplication,
                     didFinishLaunchingWithOptions launchOptions: [UIApplication.LaunchOptionsKey : Any]? = nil) -> Bool {
        application.registerForRemoteNotifications()
        FirebaseApp.configure()
        Messaging.messaging().delegate = self
        UNUserNotificationCenter.current().delegate = self

        return true
    }


    func application(_ application: UIApplication, didRegisterForRemoteNotificationsWithDeviceToken deviceToken: Data) {
        Messaging.messaging().apnsToken = deviceToken
    }


    func messaging(_ messaging: Messaging, didReceiveRegistrationToken fcmToken: String?) {
        if let fcm = Messaging.messaging().fcmToken {
            print("fcm", fcm)
        }
    }


}
You need to build this in with real device to get the fcm token.

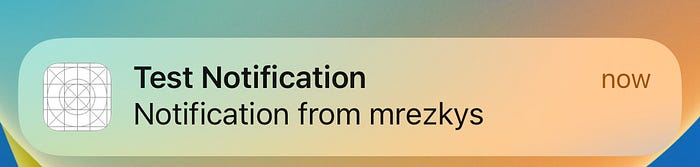
To test push notification, lets go back to our firebase console. Open Engage->Messaging and create your first campaign (Firebase Notification messages). Fill the form and click send test message.
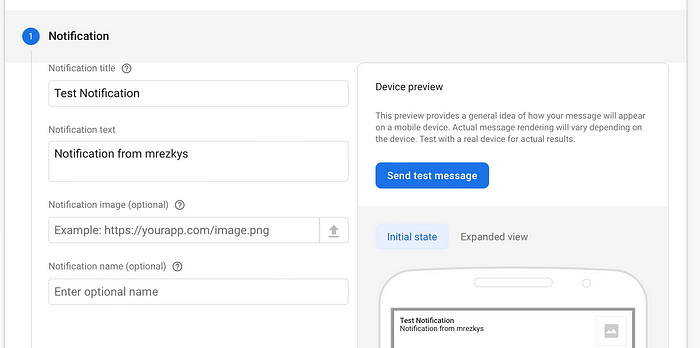
Add your FCM registration token and click test.

You need to back to home (not open the app) to see the notification.
From writer
Hello, allow me to introduce myself — I’m Muhammad Rezky Sulihin. We’ve reached the end of this tutorial, and I sincerely thank you for taking the time to read it. If you have any questions or feedback, feel free to reach out to me directly via email at mrezkysulihin@gmail.com. I’m more than happy to receive your input, whether it’s about my English writi skills or about technical explanations, i might be wrong. Your insights will help me grow.
Looking forward to connecting with you in future articles! By the way, I’m a mobile developer currently learning at the Apple Developer Academy. I’m open to various opportunities such as collaborations, freelance work, internships, part-time, or full-time positions. It would bring me great happiness to explore these possibilities.
Until next time, stay curious, and keep learning!